Sunday, October 28, 2012

make a wish and blow them out

For a few months I've been going crazy over Lush Lacquer's Birthday Cake. It was love at first sight.

It's so pretty and it reminds me of melted ice cream cake. It has an off white base with bits and pieces of  tiny glitter inside. Not too much glitter that it looks heavy , but just nice. Check out the reviews here and here

Being in Singapore, buying from Etsy is just too troublesome for me and I vowed to find a dupe, or try my hand at franken polish.

Until I found a pretty good dupe at Etude House!
Introducing Etude House Dear My Party Nails PBL 601 (only SGD $6.90 !)
The texture was alright and the base seems to be slightly lighter and perhaps more sheer than Birthday Cake. It dried quick and looked really pretty!
This is with only 1 coat
I left it at only 1 coat because I really liked how sheer it was and it really made the glitter seem more vibrant than Birthday Cake. However, I imagine it'd look alot more like Birthday Cake with a few more coats.

Definitely one of my favourite polish for a simple mani!


Saturday, October 27, 2012

Removing glitter polish.. THE FOIL METHOD


I have avoided glitter polish for precisely this reason. I had SUCH a love-hate relationship with my glitter- I LOVE how pretty it is but HATE how hard it is to remove it!

Although the white glue method is really good, I still didn't like how the mani never lasted whenever I used a glue base.

But everything changed.

Introducing the foil method!

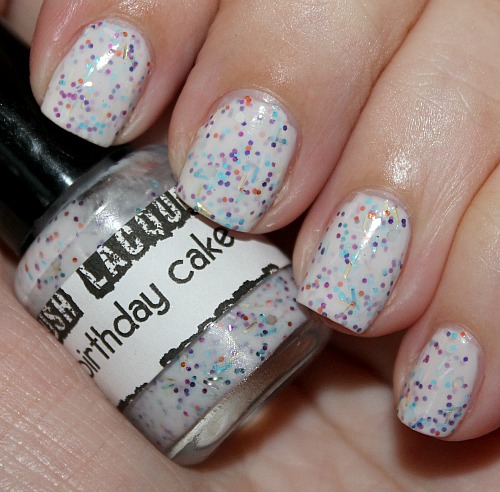
It started off because I wanted to remove this:

I started reading all about it on Instagram and nail blogs (like this), about wrapping polish remover around your nails will bits of foil. Honestly, the idea isn't new. Its how most nail places remove your Gelish or Acrylic nails, but to use it for normal glitter polish? Thats new. (to me at least).

I started by preparing all the stuff I would need. I cut up each cotton pad into quarters and tore pieces of aluminum foil as well.

After soaking each mini piece of cotton pad, I placed it on the nail and pressed it a little to really allow all the "juices" to reach all parts of the glitter polish.


And then it occurred to me that I forgot to check how long I was supposed to leave it on for. But I figured 3-5 mins should probably be enough?

Well I was wrong.

After 1 min, my fingers started to feel warm. The heat increased and I decided that I was most likely time to remove the foil pieces. I couldn't believe how fast it took!

As I removed the foil, I pressed down onto the nail and pulled the "bundle" out.

I wasn't expected anything too amazing, after all, it was only a minute!


However.....
oh wow, the entire glitter manicure came off.
I forgot to take a picture but you can see how nice and clean my thumb is! When I opened the foil bundle up, you can actually see the entire shape of my nail inside, coated in green glitter. Amazing. If you are stingy (which I obviously am), you can re-use the cotton inside to wipe off any spots that the bundle might have missed. Super easy, super quick and super AWESOME.

I no longer have to curse myself silly whenever I buy yet another bottle of glitter that i'll seldom use because removal is no longer such a pain in the butt.

I feel like Im looking at all my glitter polish with new eyes.


Sunday, October 14, 2012

Color Wheel


I was surfing around YouTube last night before going to bed and was clicking here and there and found this interesting video about the color wheel explained thoroughly with makeup. I've talked about this with some friends before and people interested in make up will know this but that's not everyone. Anyway, it's a good to know. Enjoy!

This is how love looks like!

How pretty is this??

As the holiday season is approaching, Estee Lauder is launching this limited edition powder compact! It comes in a lovely glided case and comes in the 12 different zodiac signs. It comes with a Swarovski on the clasp and contains the highly raved Lucidity Translucent Pressed Powder inside. 

Personally, I haven't tried the powder but with a name like that, I can already imagine its pretty sheer and can probably only be used to blot and set make up. 

All that for SGD 180

My brain tells me, thats WAYYYYY too much to pay for powder that you can't even see but look at that case!!!!

Friday, October 12, 2012

Green Sparkly Things

My first proper manicure from my zoya polish that I bought from Qoo10!
From their website:
"Zoya Nail Polish is a nail polish free of toluene, formaldehyde, DBP (phthalates) and camphor. "

I have no idea what that really means but I am sure it all things good! Its even safe for use on pregnant ladies!
The polish went on really smooth and it was  breeze to paint with. It was like painting with liquid butter (if that makes sense?).
I also noticed that it did not really have that alcohol / chemical smell that other nail polish formula, yet it still dried as quick as the usual ones.


You will notice that I had a golden mess going on for the ring finger. Urgh, tried to be a smart ass and tried to apply some gold with cling wrap. SUPER FAIL.

The Zoya polish lasted for really long and it was completely chip free. Even though I used SV as the top coat, it showed very little shrinkage as compared when I use SV with OPI and ChinaGlaze.

LOVE IT!